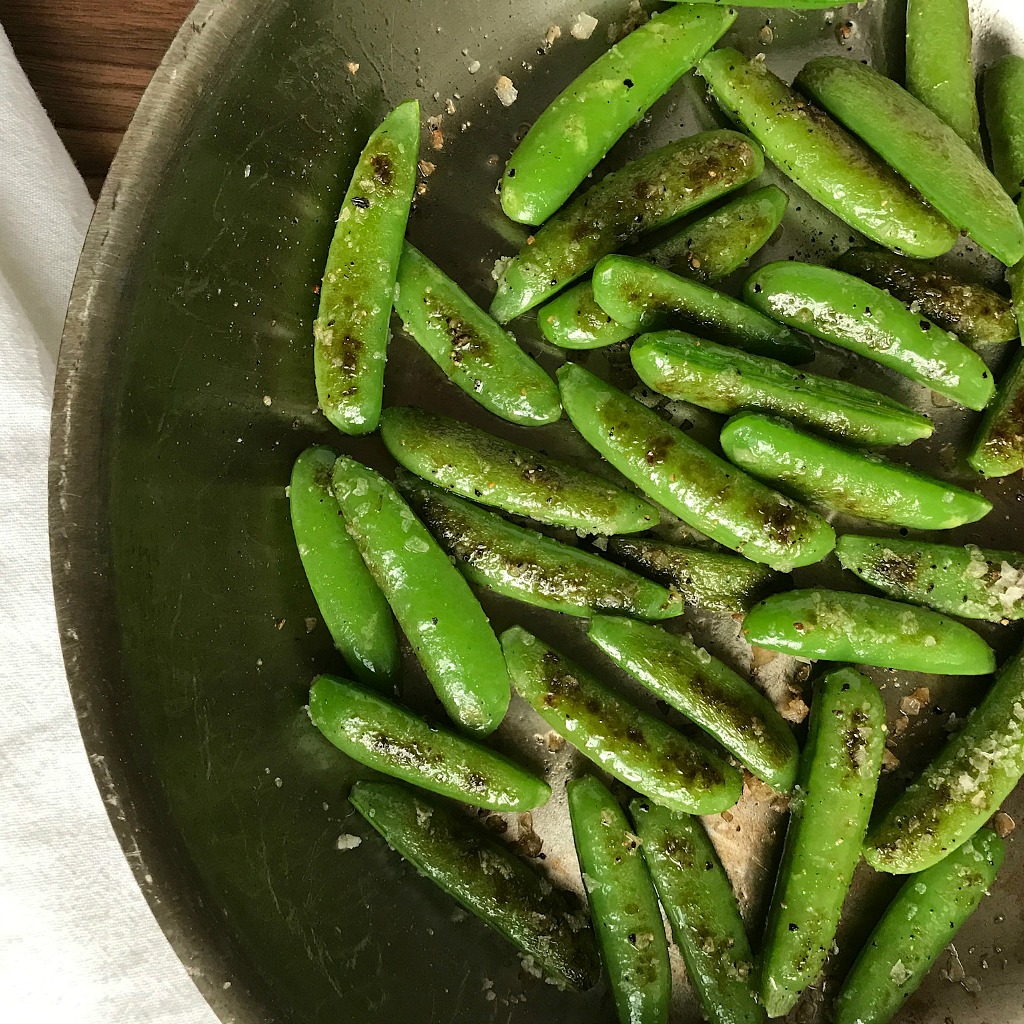
Blistered Snap Peas
The idea of “seasonally available” fruits and vegetables is sort-of a thing of the past, but “seasonally spectacular” most definitely is not! Late spring through mid-summer is peak time for sugar snap peas in my neck of the woods and they’re nearly perfect right off the vine this time of year—sweet, green, and crunchy. This easy preparation simply enhances all of those “seasonally spectacular” qualities. Follow the cooking instructions closely—with just snap peas, olive oil, and s&p in the ingredient list, technique is what this recipe is all about!

- 10-12 oz. sugar snap peas strings removed
- 1.5 tbsp. olive oil
- 3/4 tsp. kosher or coarse sea salt
- 1/8 tsp. fresh ground black pepper
- 1/2 tsp. red pepper flakes optional
- 1/2 tbsp. toasted sesame seeds optional
-
Pour olive oil into a large skillet over medium-high heat and watch it rise in temperature. You should see it turn shimmery, spread more easily across the bottom of the pan, and eventually develop little ripples. It takes roughly 2-3 minutes for these signals to show.
-
Add the snap peas (strings removed) to the hot oil so that they form an even layer across the bottom of the pan. Then, wait. Resist the urge to turn them for a good 2-3 minutes to allow some charring and blistering to occur on their bottom side. After 2-3 minutes, sprinkle kosher or coarse sea salt and black pepper over the peas and give them their first turn. They should be bright green and charred in spots. Let the peas blister on the other side for another 1-2 minutes. Add any of the additional seasoning enhancements that you'd like (not necessary—good kosher or coarse sea salt does the job of a hundred seasonings! See TIP A below). Then, transfer to a serving platter or plate and enjoy immediately!
TIP A: Salt is—by far—the most necessary ingredient in your kitchen. I'm partial to kosher salt (Morton® is my brand of choice) because it adds and enhances flavor beautifully and also lends a nice texture to finished vegetables, salads, and meat. You've probably heard the pros claim that one of the primary things that separates high-quality restaurant food from your average home cookin' is salt—not just how much the pros use, but also when and how they use it. Sure, salt can be used to add salty flavor. That's essentially what you're doing when you add it to popcorn, fries, or steamed veg. Delicious! Salt is also used to bring out the natural flavor of foods. This is why it's often important to add salt in small increments while you are cooking. And—my favorite—salt is used to add texture and crunch. This is where kosher, coarse, or flake salt shine. Add these salts at the end (or near the end) of cooking vegetables, composing salads, baking brownies, or (heck!) even making a sandwich. Salt is often the "it" ingredient—the thing that turns something simple into something sensational! I know, shocker, right?!?